Note: This document is quite long. There is a PDF version at the bottom of the page!
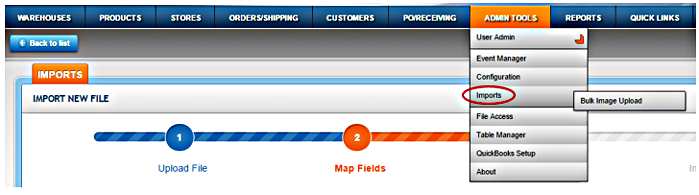
Go to Admin Tools-> Imports, and click directly on Imports
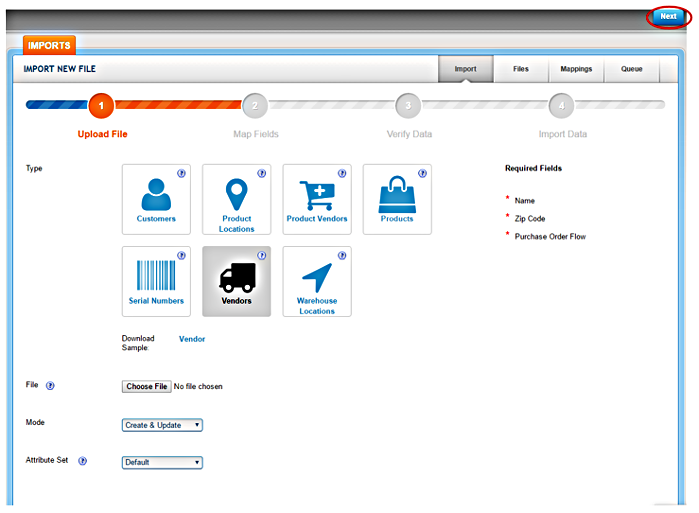
Step 1 - Upload File
|
Type: Choose "Products" File: Choose CSV file – see attached field definitions for file format. The fields where data is REQUIRED in the file are listed in the figure above, on the right side of page. Note that the fields in the CSV file are NOT required to be in any specific order. Mode:
Attributes set – for user defined attributes not covered by default fields. Will be covered separately as an advanced topic. Warehouse – Select default unless directed otherwise. |
Once all file import settings have been chosen, click NEXT (upper right hand corner)
Step 2: Map Fields automatically vs Create a Mapping
For most imports, you can allow automatic mapping as long as all the column headers match the database fields, however, the Product import, tends to have many exceptions.
Exceptions to Automap for Product Imports
In most cases you are going to want to manually map the fields in your product file, and ideally you should still ensure that all of your column headers match the field definitions for ease in mapping. Particular items that require manual mapping occur when product data uses variations or kits, as you have to provide some additional information on how the data is ultimately configured in SalesWarp. When exporting data, or compiling data from your existing system, you will very likely find that additional import data is easier to combine into a single file. This is FINE!
You can actually use the same data file (or a file with minimal alterations) for additional types of imports. Images, categories, configurable products or kits, require manual mapping to correctly import. You may choose to include Vendor or Location info in your product file that can be utilized in Product Vendor or Product Location imports. Unmapped or non-matching fields in the file included for other imports will be ignored in the product import. When performing multiple imports, the one thing you must remember is that you always need to include/map the required fields for each type of import.
Configurable Products: Formatting the import file to successfully import variants.
Configurable products/SKUs are those that have variations such as color and size.
Example #1: One single variant: Color
The bangles come in assorted colors, but have no sizing associated. In Cell B2, ABSB is "Core" SKU, and E2 identifies the variation name, in subsequent rows the SKU would reflect the specific variation NAME, and the Variation_Value field would contain the VALUE

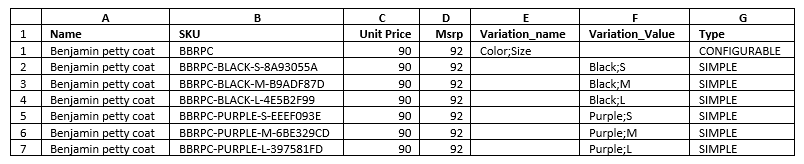
Example #2, Multiple Variants: Size and Color
In Cell B1, BBRPC is identified as the Core SKU, and E1 identifies the variation names, separated by a delimiter. In subsequent rows the variation values are included in the SKU and in the variation value column, as well, again, separated with semi-colons. You must use the first row of a group of SKUs to declare a base SKU and the types of variants it has, before listing the variants. When including multiple variants, the order in which you include the variant VALUES (here in column F) must match the order in which the variation NAMES are defined (here in column E)
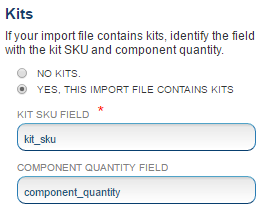
Kits are groups of products that are sold as a single unit. For instance, a motherboard, hard disk, video card, power supply, memory and case, would be kitted to make a complete PC. You sell all of these products individually, but will also assemble and sell as a complete unit. If you have kits, the kit SKU must be listed before listing any variants as well. If you have configurable items and those items are also parts of kits, then the configurable items are listed first, then kits, then the individual SKUs for the variants. When including multiple variants, the order in which you include the variant VALUES (here in column F) must match the order in which the variation NAMES are defined (here in column E) Note that the KIT SKU can be defined as anything, it doesn't have to be a concatenation of the SKUs making up the Kit, but it does need to be populated in all rows to which the kit applies.

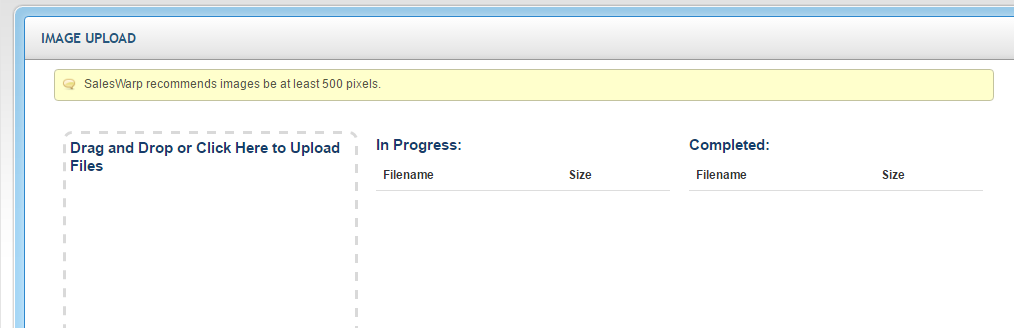
Images If you utilize "local" images, you should bulk load them into SalesWarp before importing a product file that refers to images. From Admin Tools, select Imports, then Bulk Image Upload
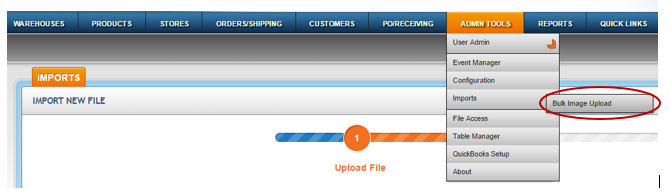
You can either select image from a file folder and drag where indicated, or click and select a file folder from which to load images.
If you utilize a third party image management system, such as Adobe Scene 7, your import file can contain complete URLs, which the SalesWarp system will reference when providing image info to storefronts. If you have already uploaded images to the sales warp server, your file should refer to the original file image, simply by name. In the example below, consider that the images already exist on the SalesWarp server. (SalesWarp manages the file path) To simplify image management, we have opted to have our image name match the SKU. See step by step instructions further within this document for additional suggestions on image naming.

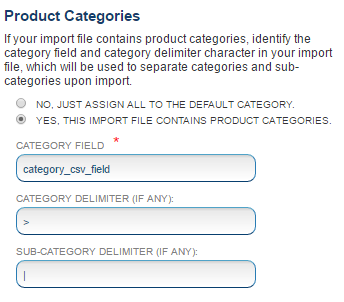
Categories SalesWarp allows multiple categories per SKU (virtually unlimited), and allows you to import this categorization into the system at the same time you import products. The figure below shows a categorization scheme created in advance in SalesWarp, as it will aid in illustrating how the categorization in the file needs to be formatted. The TOP category is the base category, but you do not have to refer to it in the file.
The Categories of Apparel, Accessories & Footwear, contain sub-categories beneath. When you build your file you need to determine and consistently use delimiters between Main and Sub-categories. There is great flexibility there, you can essentially use whatever delimiters you like, as long as all items are delimited consistently. We recommend you do not use "," as a delimiter, in case you have commas in any of your product descriptions. This could cause unintended and undesired effects, including bad data in subsequent columns.
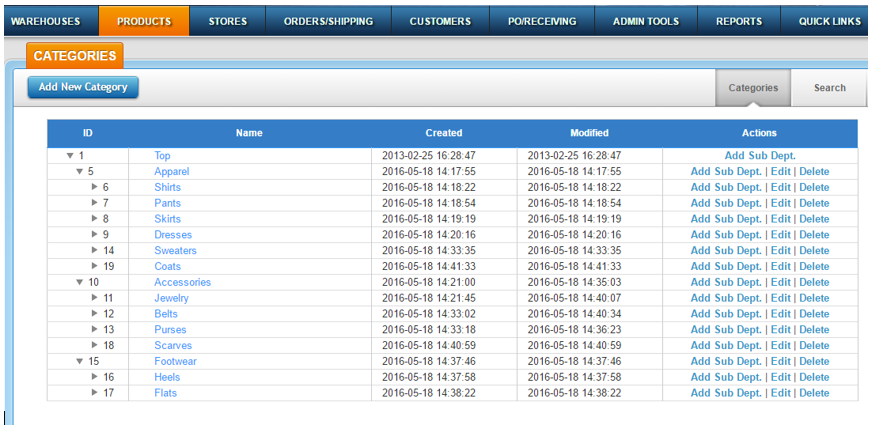
| Recommended Delimiters: SalesWarp recommends and has used in this example a delimiter for the main category of ">" (greater than symbol) and sub categories with "|" (pipe symbol) |
You always have to refer to the main category, and then combine main category and sub-category as shown below.

If you have only a single category for each SKU, no delimiters are required. For instance, if we think back to computer parts, you might have a single category for each component, such as motherboards, video cards, sound cards, memory, power supplies, and you might sell multiple brands, but all SKUS would fall within main categories. Of course you could also opt to have different brands within their own categories. Categorization can be as broad or granular as you wish.
Our test file has multiple data types that will require a custom map.
When you move from Step 1 to Step 2, choose Create New Mapping, and the import Mapping Details screen will display.
Remember: required to always include the SKU, Unit Price (selling price), MSRP, Type (simple, configurable, kit), and the Product Name.
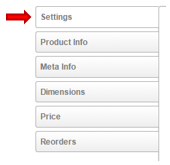
Note that there are multiple tabs in the Product Mapping section, and since you are creating a map you must review each tab.
If you have ensured that your column names match the import file field definitions, then mapping shouldn't be that hard. Anything with a red asterisk * is required, so make sure you map those (the system will remind you if you haven't!)
Step by Step Product Import Instructions
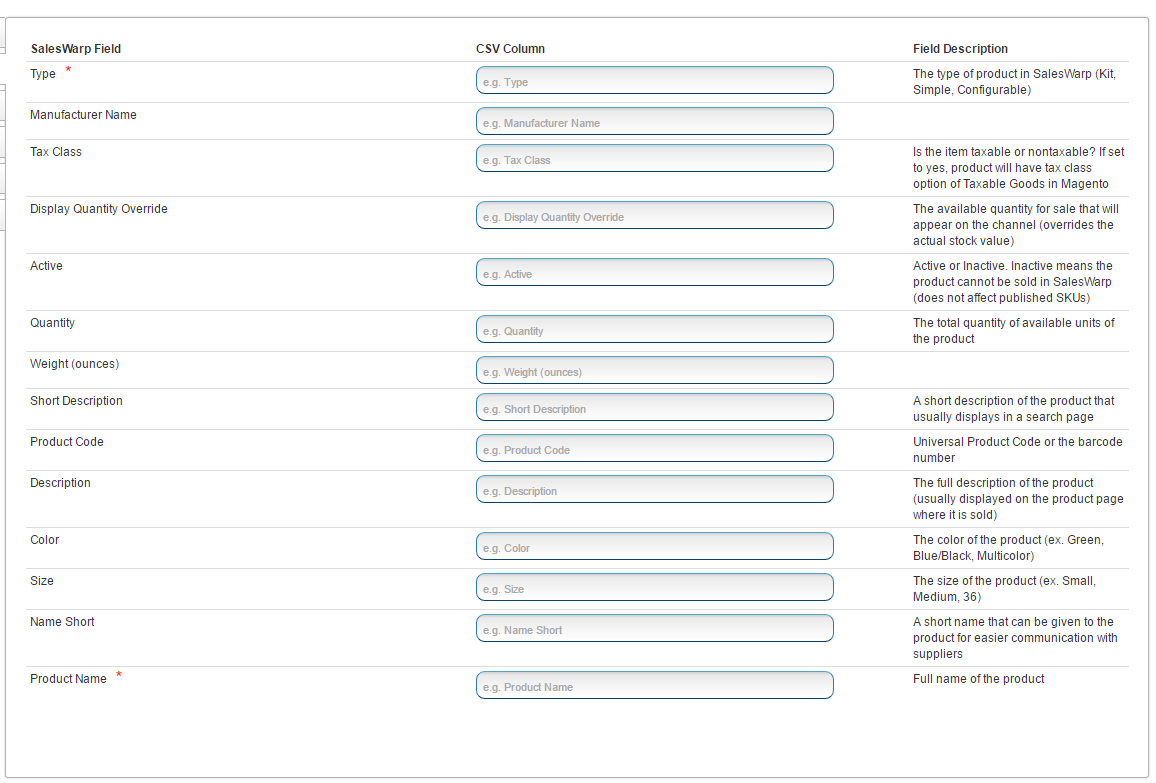
Product Info Tab: Note there are two required fields, (Type: simple, configurable or kit) and Product name, but, it is surely in your best interest to include as much data as possible. If you don't have it all immediately, you can always come back and do various bits and pieces, as separate imports.
|
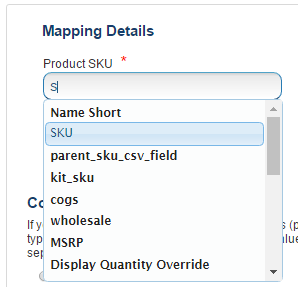
Map the core SKU When you type in the field, the system displays fields from your CSV file to assist with mapping. (all the fields displayed in the figure to the right contain "S") |
 |
|
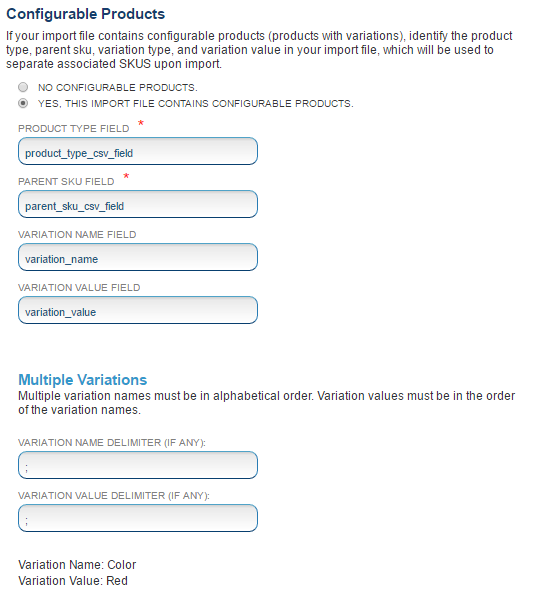
Set Configurable products to YES, and continue mapping individual items as required. Configurable products are the same underlying product with variations such as color and size. Apparel for example - you sell a basic Tee, it comes in five colors and five sizes.
Note: that the variation values must be in the same order as the variation names appear |
 |
|
Map KIT info
|
 |
|
Map Image info
If your images are stored locally on a PC or network drive, you can bulk upload the images directly into SalesWarp. A suggestion to simplify imaging is to have your images be the same as your SKU or Product ID and incorporate variants into the image name. Devise a structure to consistently name your images. Example: Base SKU 12345 for a pair of denim jeans that come in black and blue, with a front and back shot. You could refer to them in the image field as follows. 12345BLU-F.jpg;12345BLU-B.jpg |
 |
|
Specify Product Category fields
|
 |
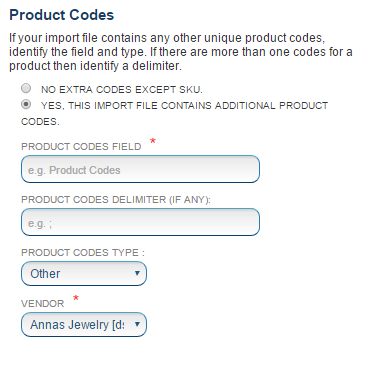
Product Codes refers to additional SKU/product identifiers such as UPC codes, or Amazon ASINs. You could potentially include UPCs in your general product file, but if you have multiple types of product codes, i.e. UPCs and ASINs, etc then they would likely be separate uploads. You cannot load two different types of product codes at the same time, for instance you could not include UPCs and ASINS in the same import. Additionally, you can only include a single vendor for each code.
|
 |
|
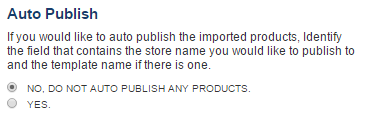
Auto Publish – do not autopublish at this time. You can use the import functionality later on to turn it on, however, you want to review SalesWarp and make sure everything is good first, then opt to publish out to storefronts. |
 |
Continue moving down the tabs on the left to complete the product mapping.
Product Info Tab: Note there are two required fields, (Type: simple, configurable or kit) and Product name, but, it is surely in your best interest to include as much data as possible. If you don't have it all immediately, you can always come back and do various bits and pieces, as separate imports.
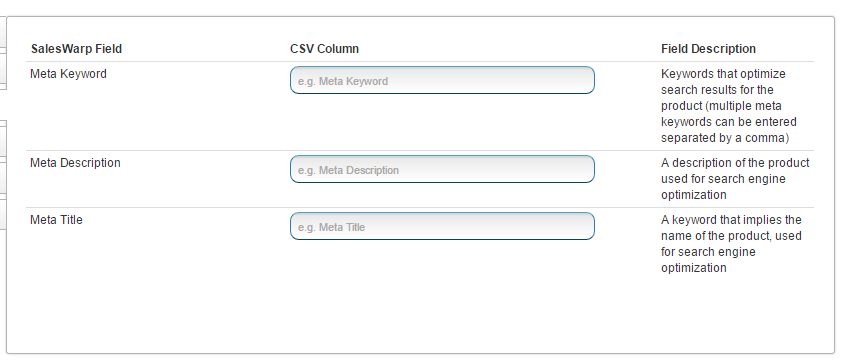
Meta Info Tab: Nothing required here, but useful for storefronts that accept this data.
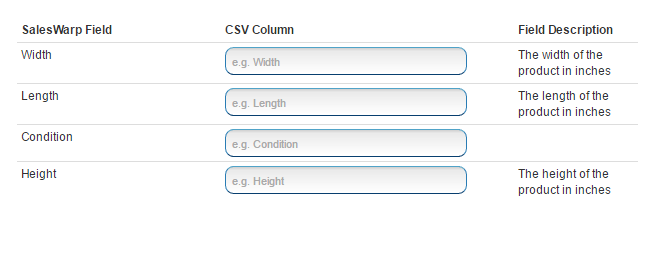
Dimensions Tab: Extremely helpful to include this information for shipping purposes.
Price Tab: (Unit price and MSRP are required on this tab)
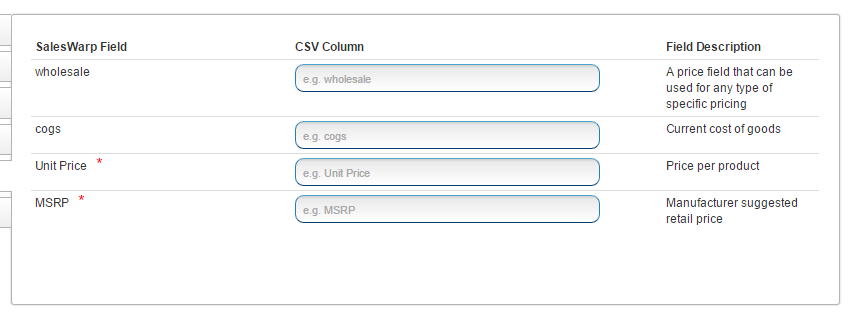
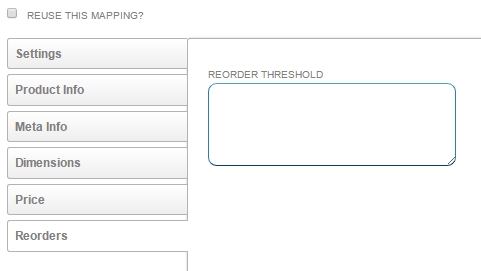
Reorders Tab: Contains a single field – when stock hits the number in this field a PO will automatically be generated to the default vendor for replenishment. When created, these system POs will display in the PO/Receiving menu under Purchase Orders for approval and further processing. Leave this field BLANK if not utilizing this functionality.
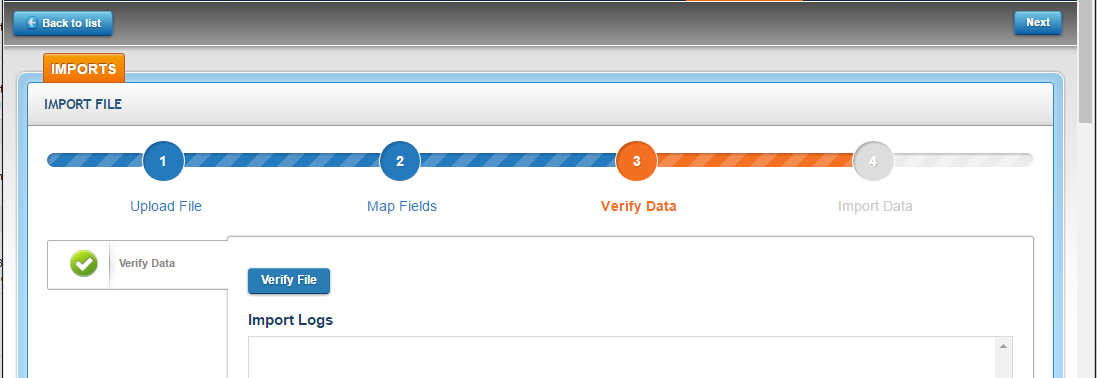
Step 3. Verify and Process the Import File
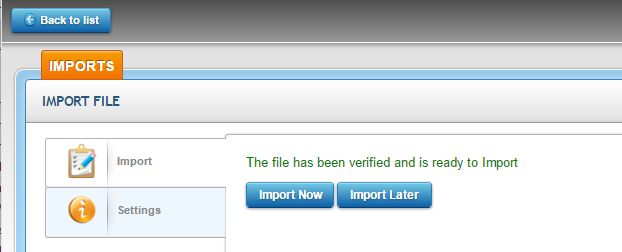
Press the Verify File button and the system will read the file data, and you will be alerted to any specific issues in the file that need to be corrected prior to importing. If there are no issues with the file, you may be given an option to process the file immediately, but more likely you will be required to queue the file to process later. (Process now functionality is based on the file size - If you have more than a few vendors, your file will probably not pass the size check.)
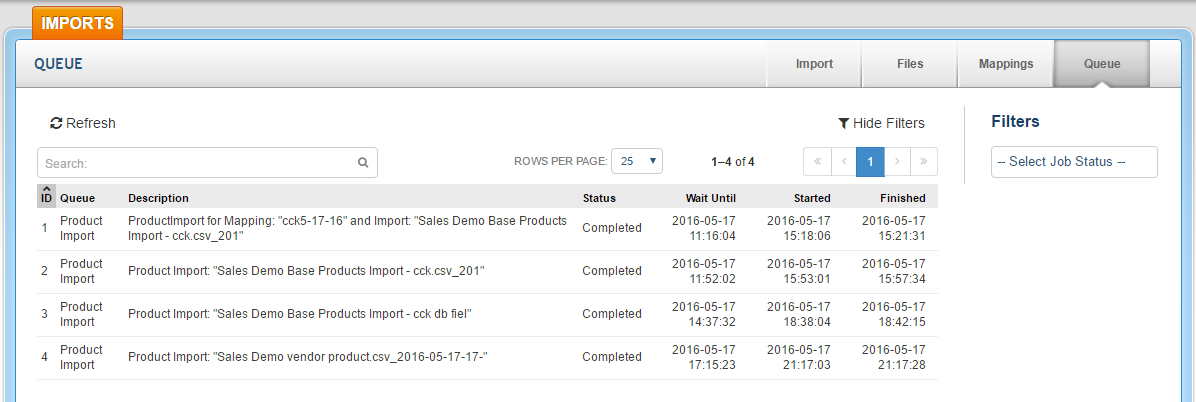
If you want to monitor the queue, press "back to list" button in top left hand corner, and then the queue button on the far right - you will be able to see if the file has begun or finished processing. Note you may need to hit the refresh button on your browser.

Comments