Go to Admin Tools-> Imports, and click directly on Imports
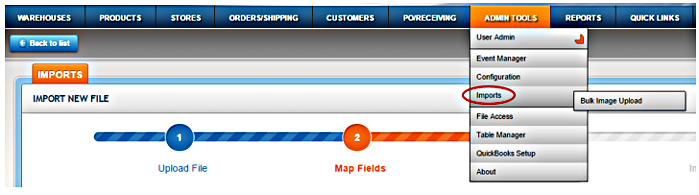
Step 1: Upload File
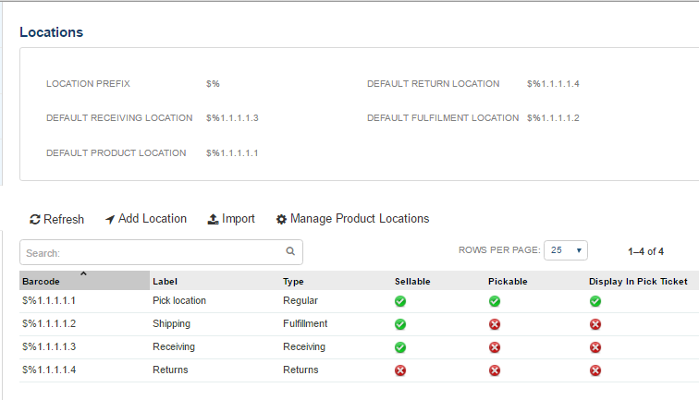
Warehouse locations are not required in SalesWarp. However, if you are thinking of implementing locations, now is the time. Warehouse locations are something you would likely only import once. The location barcode format consists of six segments of one to three characters. The first segment is a prefix, and for consistency's sake, we recommend "$%". All locations in your SalesWarp system must begin with the same prefix. The simplest location would therefore be: $%1.1.1.1.1. You can use the segments to define warehouse zones, aisles, racks, shelves, bins, etc.
|
Type: Choose "Warehouse Locations" File: Choose CSV file - see attached field definitions for file format. The fields where data is REQUIRED in the file are listed in the figure above, on the right side of page. Note that the fields in the CSV file are NOT required to be in any specific order. For this import to be successful, the following fields must also be set: "Is_pickable", "is_sellable", "is_displayed". Unless directed otherwise, or you know otherwise, all should be set to "1". Mode:
Warehouse: Choose default unless directed otherwise |
Once all file import settings have been chosen, click NEXT (upper right hand corner)
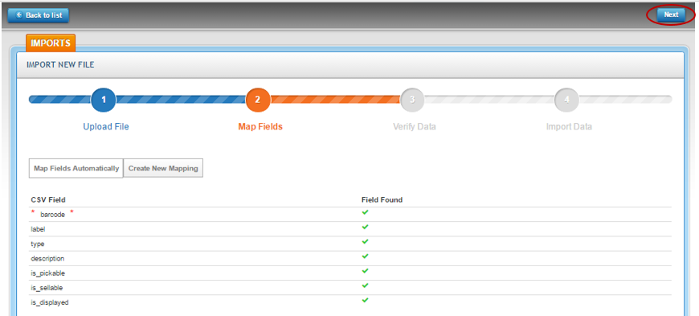
Step 2: Map Fields automatically vs Create a Mapping
There are no exceptions for the vendor import that would require manual mapping in this file.
(figure above does not necessarily include all available fields, see attached field definitions)
The file is then read, and a list of the fields in the SalesWarp database which match, or (don't match) the CSV file is displayed. If you have an "X" in any row for the "Field Found" column, then you either need to (1) rename those fields in your CSV file to match the field from list, 2) add fields that may be missing entirely, or (3) create a new mapping.
For missing fields, the field headers are required, simply add them as blank columns. Data is not required except as noted above. Note that if you need to alter the file, you will have to start the import process again.
If you have no "X" in the "Field Found" column, then you may immediately select the map fields automatically button. Additionally, note that if there are fields in the file that aren't listed they will be ignored. Note: if the headings do not match, and you do not map manually, then those columns, also, will be ignored.
Remember that the field headings are case sensitive! It will still likely be easier to rename the headings in your file, than to build a map. That way you can always use the automatic function, and not have to worry about constantly creating or reusing an existing map.
When ready to continue, click "Next" in upper right hand corner.
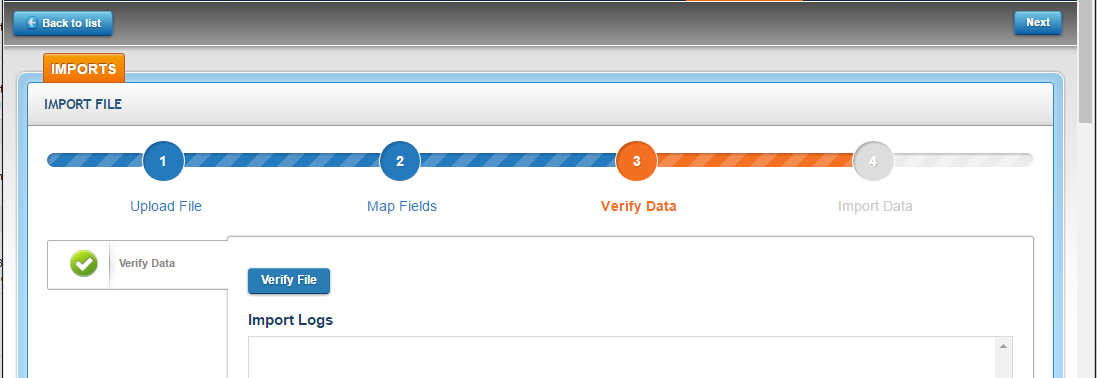
Step 3. Verify and Process the Import File
Press the Verify File button and the system will read the file data, and you will be alerted to any specific issues in the file that need to be corrected prior to importing. If there are no issues with the file, you may be given an option to process the file immediately, but more likely you will be required to queue the file to process later. (Process now functionality is based on the file size - If you have more than a few vendors, your file will probably not pass the size check.)
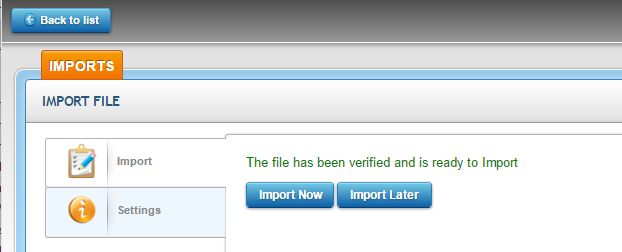
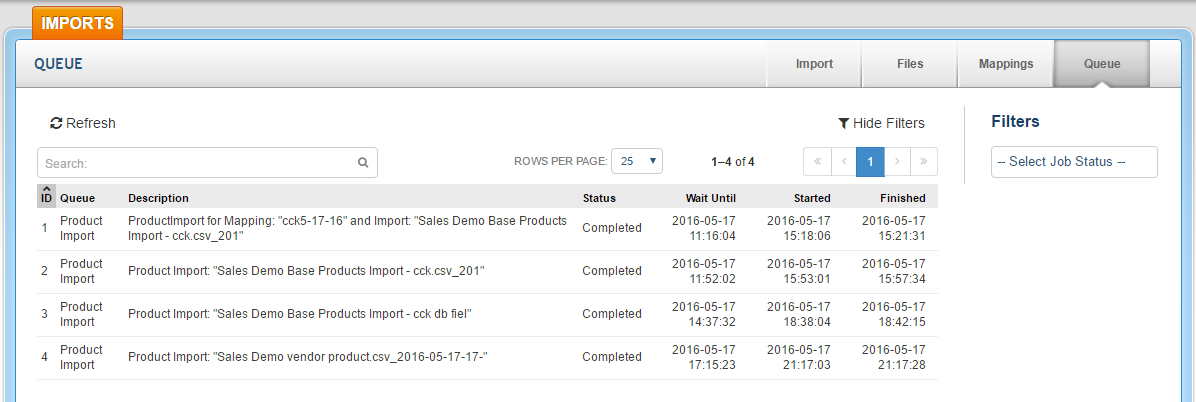
If you want to monitor the queue, press "back to list" button in top left hand corner, and then the queue button on the far right - you will be able to see if the file has begun or finished processing. Note you may need to hit the refresh button on your browser.

When complete, access Warehouses, view the desired warehouse and review the location entries. Below is a VERY simple warehouse location schema.
Comments