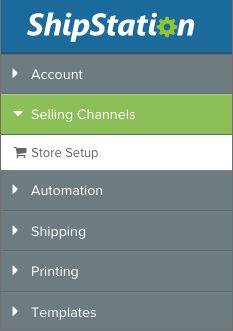
SalesWarp integrates with ShipStation, a web-based application for managing shipments from your online store. Connecting SalesWarp to your ShipStation account is quick and simple. First, log in to your ShipStation account, then go to the gear icon in the top right corner to open ShipStation Settings. Then go to Selling Channels, under the options on the lefthand side, and select Store Setup.
To add SalesWarp, click on Connect a Store or Marketplace. Scroll down and click the shopping cart icon that says "Custom Store" to add a Custom Store. The username and password will be the login credentials you use sign into SalesWarp. For the URL, use the URL you use to access SalesWarp (https://emerging.saleswarp.com or https://small.saleswarp.com) with the following appended to the end of the URL: /base_orders/updateOrders/ so that the URL you enter will be:
https://emerging.saleswarp.com/base_orders/updateOrders/ for EMERGING level users and https://small.saleswarp.com/base_orders/updateOrders/ for SMALL level users.
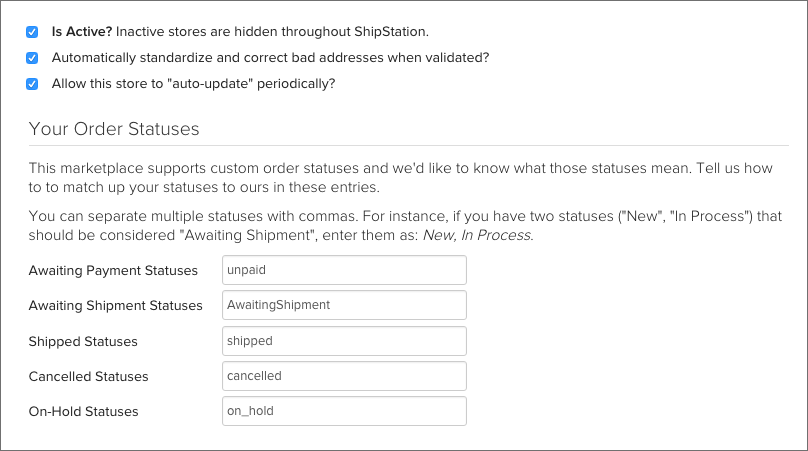
Give your store a name, you can leave the First Order # field blank, and optionally give SalesWarp order numbers a prefix to identify them. Save the store and make sure basic information is filled out, such as Company Name, Phone Number and Email. Make sure the store is active and allowed to "auto-update" periodically. Set the Awaiting Shipment Statuses to AwaitingShipment (see image below).
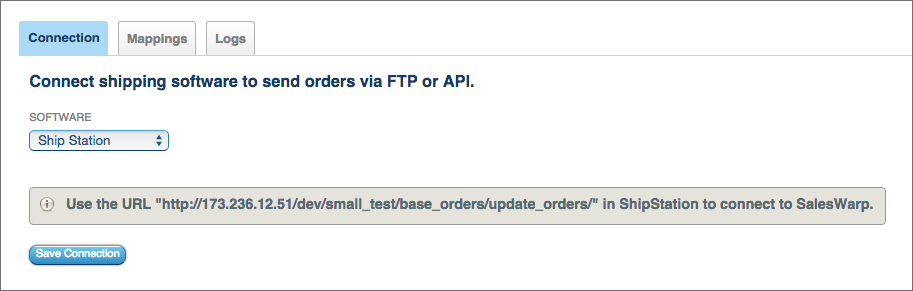
Next, go back to the list of stores under Store Setup, and click on the Connection link next to the store you set up for SalesWarp. The username and password will be the login credentials you use sign into SalesWarp. For the URL, use the URL you use to access SalesWarp (https://emerging.saleswarp.com or https://small.saleswarp.com) with the following appended to the end of the URL: /base_orders/updateOrders/ so that the URL you enter will be:
https://emerging.saleswarp.com/base_orders/updateOrders/ for EMERGING level users and https://small.saleswarp.com/base_orders/updateOrders/ for SMALL level users.
Click Test Connection to make sure the credentials are correct, and click Finish.
Now you are ready to turn on ShipStation in SalesWarp. In SalesWarp, go to the Warehouses menu, and click Edit next to the Warehouse from which you are shipping. Click on the Ship Orders tab to the left, and select Ship Station from the list of options in the dropdown menu.
That's it! You are now ready to process SalesWarp orders in ShipStation. Orders in the Order Ship Check status in SalesWarp will be ready to go to ShipStation. To pull orders into ShipStation, use the Refresh  button. When an order is shipped in ShipStation, the tracking number will be added to the order in SalesWarp, and the order will update to Complete status.
Comments